(Last Updated on March 3, 2022)
Add a USB-connected printer or network printer to Windows. Set up your printer using the printer drivers that come built into Windows.
Add a USB-connected printer to Windows
Set up a USB printer connection in Windows without installing any additional drivers.
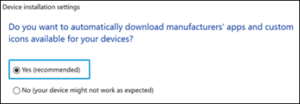
- Search Windows for and open Change device installation settings, and then make sure Yes (recommended) is selected.
- Make sure an open USB port is
 available on your computer. Do not connect the printer to a USB hub or docking station as the printer might not receive enough power to operate properly.
 - Turn on the printer, and then connect the USB cable to the printer and to the computer port.
- If a Found new hardware message displays, follow any prompts to install the printer.
- If you can print, the driver installed successfully.
- If you cannot print, continue with these steps to add the printer in Windows settings.
- In Windows, search for and open Add a printer or scanner.
- Click Add a printer or scanner, and then wait for Windows to locate available printers.
- If your printer is found, click it, and then click Add device to complete the driver installation.
- If your printer is not found, continue with these steps.
- Click The printer that I want isn’t listed.

- In the Find a printer by other options window, select Add a local printer or network printer with manual settings, and then click Next.
- In the Choose a printer port window, select Use an existing port, select USB001: (Virtual printer port for USB) from the drop-down menu, and then click Next.
- Follow the instructions to install the driver for your printer model.
Add a network printer to Windows
Set up a Wi-Fi or wired network printer in Windows without installing any additional drivers.
- Search Windows for and open Change device installation settings, and then make sure Yes (recommended) is selected.
- Place the printer and the computer near the Wi-Fi router.
- Connect the printer to the same network that your computer is connected to.
- Wi-Fi connection for printers with a touchscreen control panel: Open the Setup, Network, or Wireless settings menu, select Wireless Setup Wizard, and then follow the instructions to select the network name and enter the password.
- Wi-Fi connection for most printers without a touchscreen control panel: Press and hold the Wireless button for five seconds or until the wireless light starts to flash. Within two minutes, press and hold the WPS (Wi-Fi Protected Setup) button on the router until the connection process begins. The printer wireless light stops flashing when the connection completes.
- Wi-Fi connection for HP Deskjet 6000 and 6400, ENVY 6000 and 6400, and Tango printers: Press and hold the Wi-Fi button and the Power button on the back of the printer for five seconds until the blue bar flashes. Within two minutes, press and hold the WPS button on the router until the connection process begins. The blue bar stops flashing when the connection completes.
- Wired (Ethernet) network connection: Connect the network cable to the printer Ethernet port and to an available port on the router or access point. At the printer port, the green light should be steady and the orange activity light should blink.
- In Windows, search for and open Add a printer or scanner.
- Click Add a printer or scanner. Wait for Windows to locate the printer. When found, click the printer name, and then click Add device to complete the setup. If your printer is not found, click The printer that I want isn’t listed. In the Find a printer by other options window, select an option to locate and add the printer.
Source Link: https://support.hp.com/us-en/document/ish_2224996-1993298-16
Click to rate this post!
[Total: 2 Average: 5]